Today we are going to talk about some fun simple tweaks you can make to your lifestyle product photography! A complete walkthrough of how to take an okay product photo and make it even better. All my best tips and ideas for styling your pictures to sell more!
Please note there are some affiliate links in this post!

Product Photography Styling For Bath and Beauty
Let's start with some of the fabulous bath and beauty products from Dr. Martha's skincare line, Mei Zen.
This is the kind of shot I see a lot when Bath and Beauty makers think "lifestyle photos". They throw it up against a wall in their bathroom and call it a day.
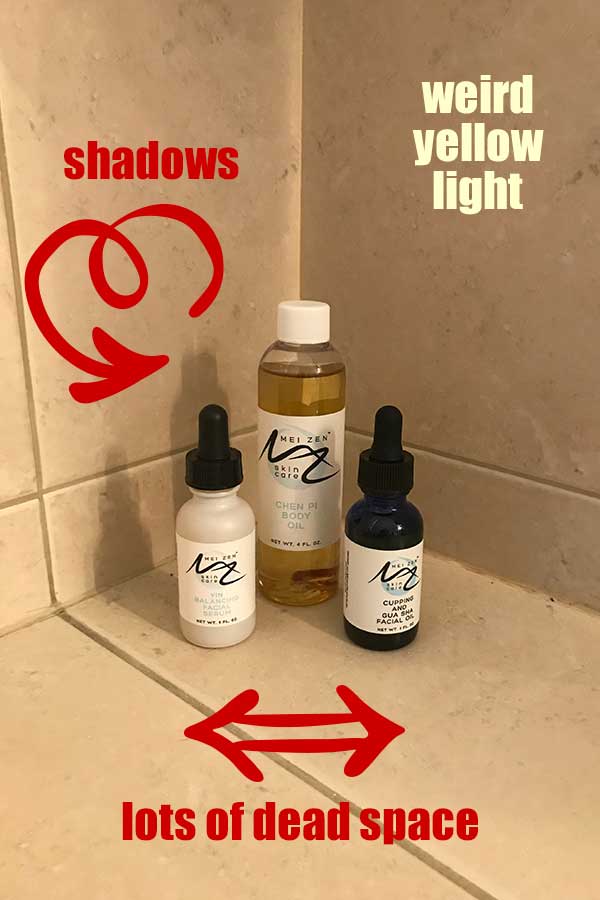
There are some problems with this shot right off the bat. There is a weird yellow light in my bathroom, there is a harsh shadow to the left and there is way too much space around the products making them look tiny and a wee bit sad.
So let's clean up this shot first before we go any further!
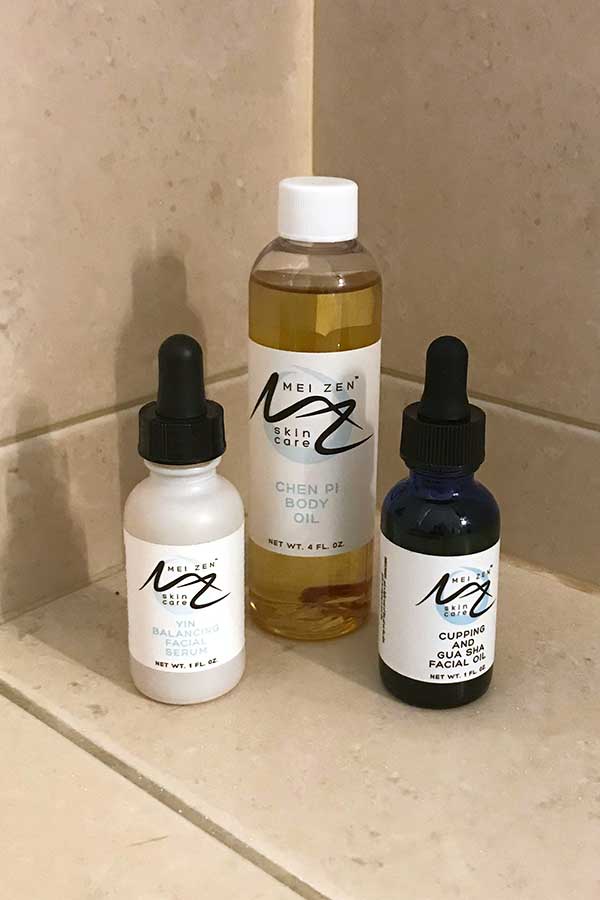
While it is still not that fancy, it is loads better at showing off the product!
First off, it is super easy to lighten your product photos for free, so get that out of the way first.
Then crop the photo in so that the products take up more of the frame. We still have that harsh shadow but since this isn't our final picture, we can ignore it for now!

If we did nothing but add a cute little plastic fountain, crop it in and lighten it up, we would be WAY closer to having a picture that we could share on Pinterest or Instagram proudly!
But what if we added another styling piece? I have these fun, flat decorative ornaments that would make this look even more lux!
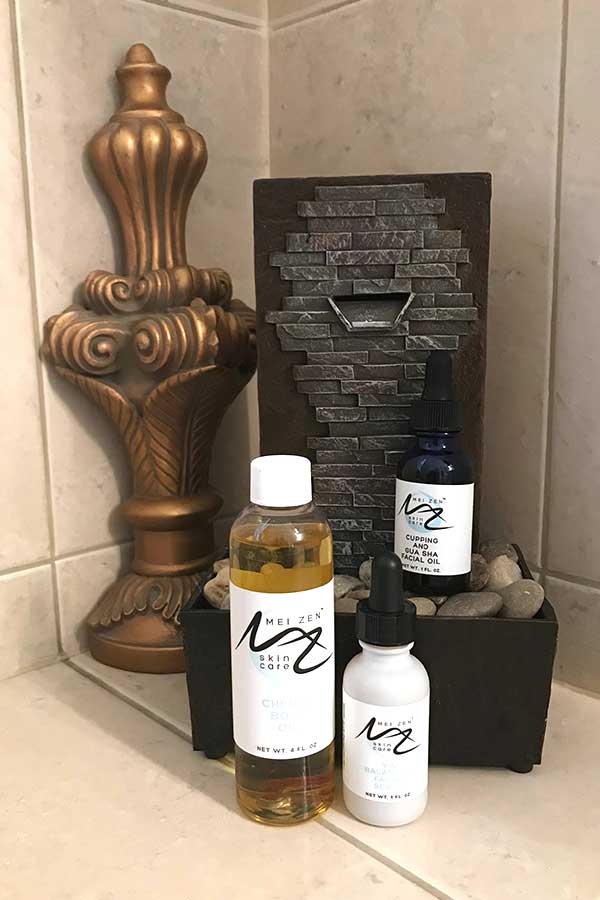
Ohhhh perfect! Fills the frame, all the labels are light and bright and it is interesting to look at. PLUS with the fountain it gives the feeling of peace and calm.
And then.. I ... went ... too... far!

Last but not least I thought that it might be good add my little statue of Ganesh in there. Whoa Nellie was that a mistake!
He was not really clear, it messed up the balance of the shot and was distracting from the product that we are trying to sell.
Like Coco Chanel said, “Before you leave the house, look in the mirror and take one thing off.” Sometimes having that one more thing makes a bad difference!
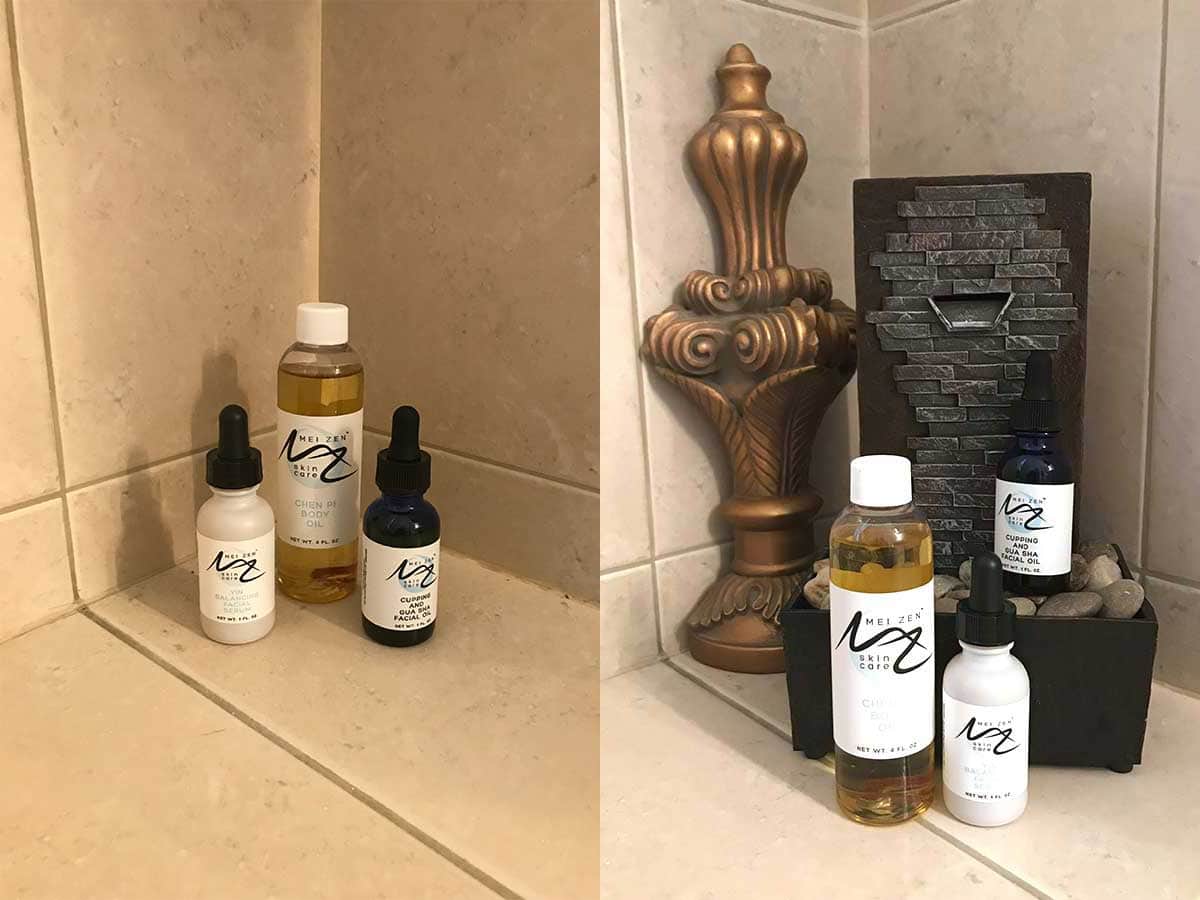
And here is the before and after of the Mei Zen products.... quite a difference with just a few tweaks!
One last thing that I didn't mention was that in the after picture I got down in the tub and took the shot more head on rather than from way overhead.
Vintage Lifestyle Product Photography
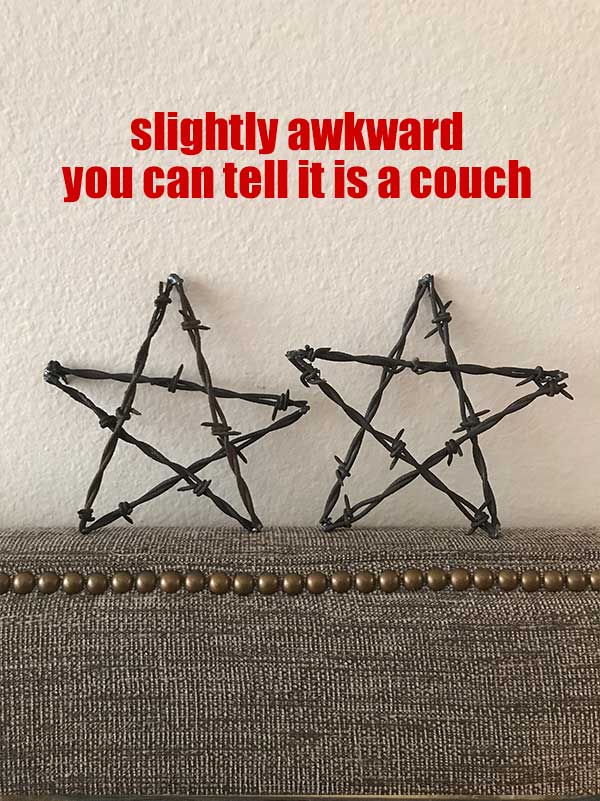
Next let's look at a vintage shot for my shop, So Glamorously Vintage! Oftentimes I will see Etsy sellers take a picture that is awkwardly apparently against a wall or on a couch. While the top of my couch does have a rather cool beaded edge, it definitely doesn't feel like a professional photography shot!
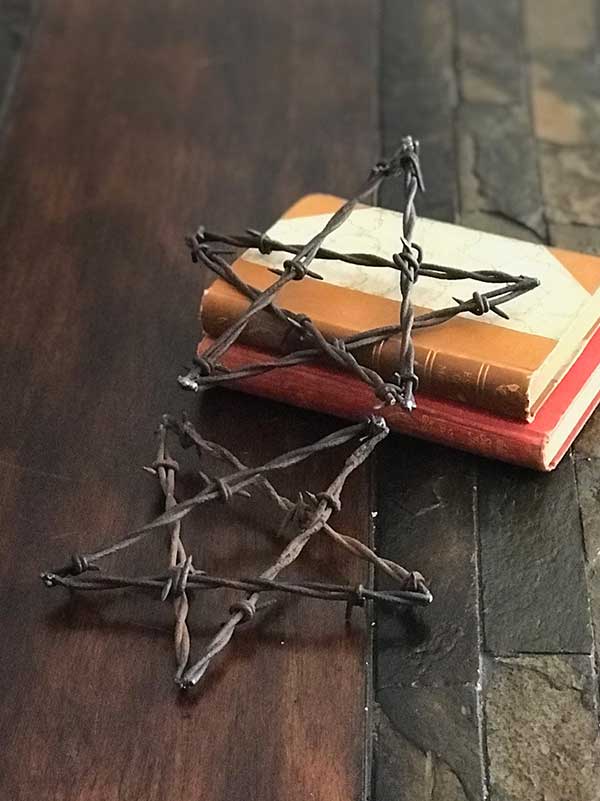
For my next shot I put them on a rustic background that was okay, but not great. There isn't really enough contrast with the table to be able to see the stars in all their glory.
So lastly I went with a ratty old stained piece of cloth on a tarnished metal tray. I KNOW! For most shots this wouldn't be the perfect choice, but because I am selling old rusty stars it makes the mood just perfectly!
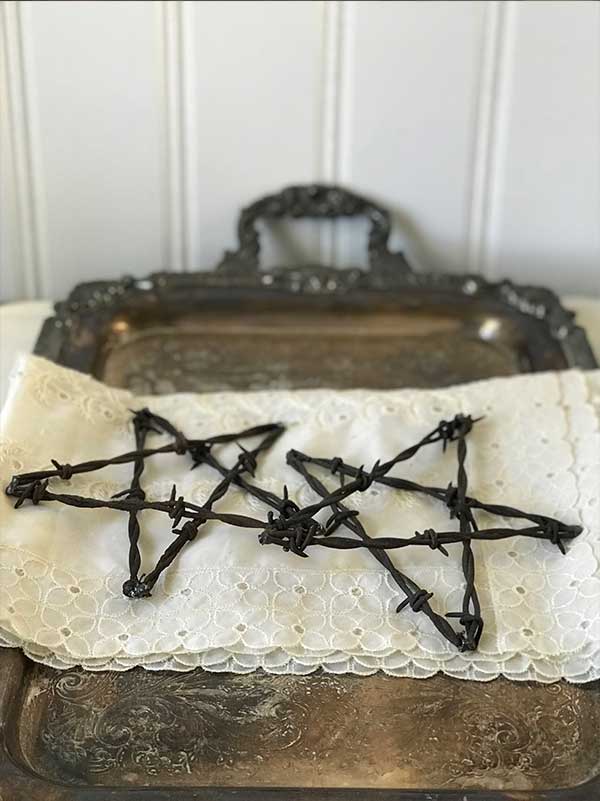
The reason this works so well is that the white color of the doily thing behind the stars really makes them pop out and be the hero of the picture! The ratty old tray looks cool and interesting without taking away from the product which is front and center.
And here is the final before and after for the vintage shot! Honestly, it took about 2 minutes to take that picture and it would look great on Pinterest or Instagram.
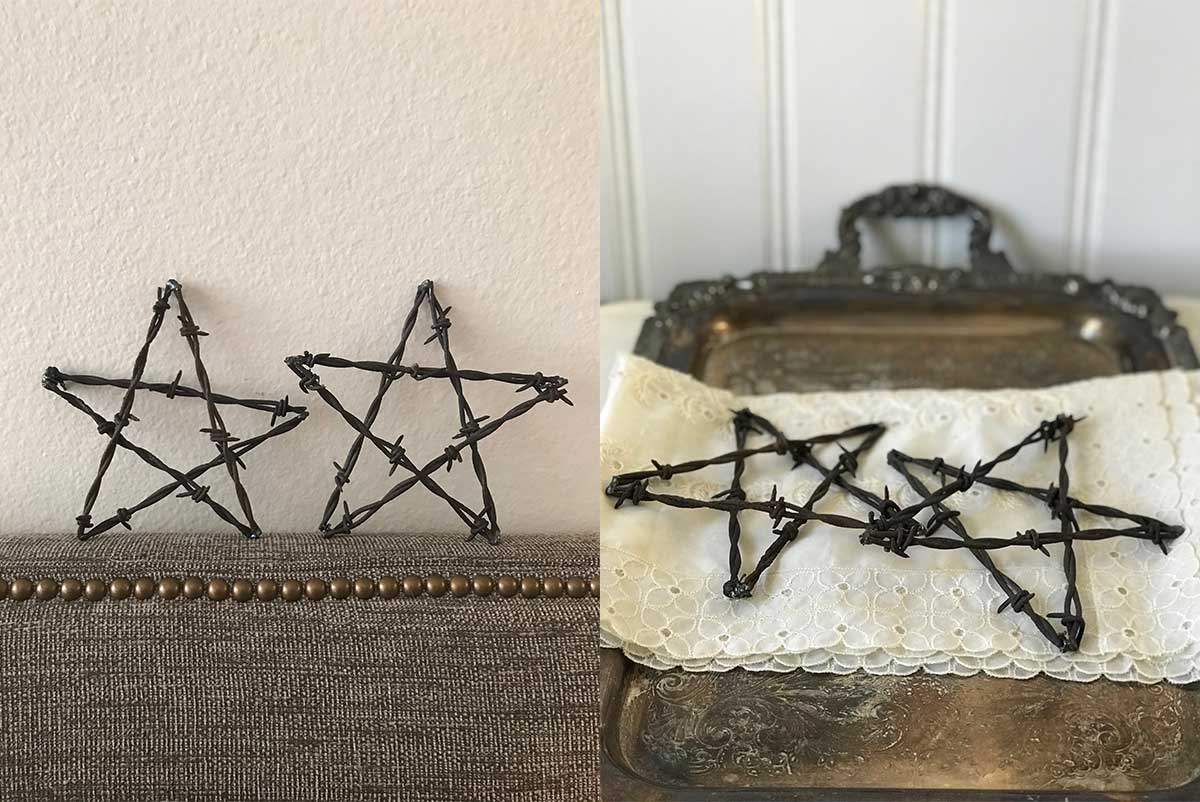
The difference between the before and after is pretty darn shocking!
Jewelry Product Photography Styling
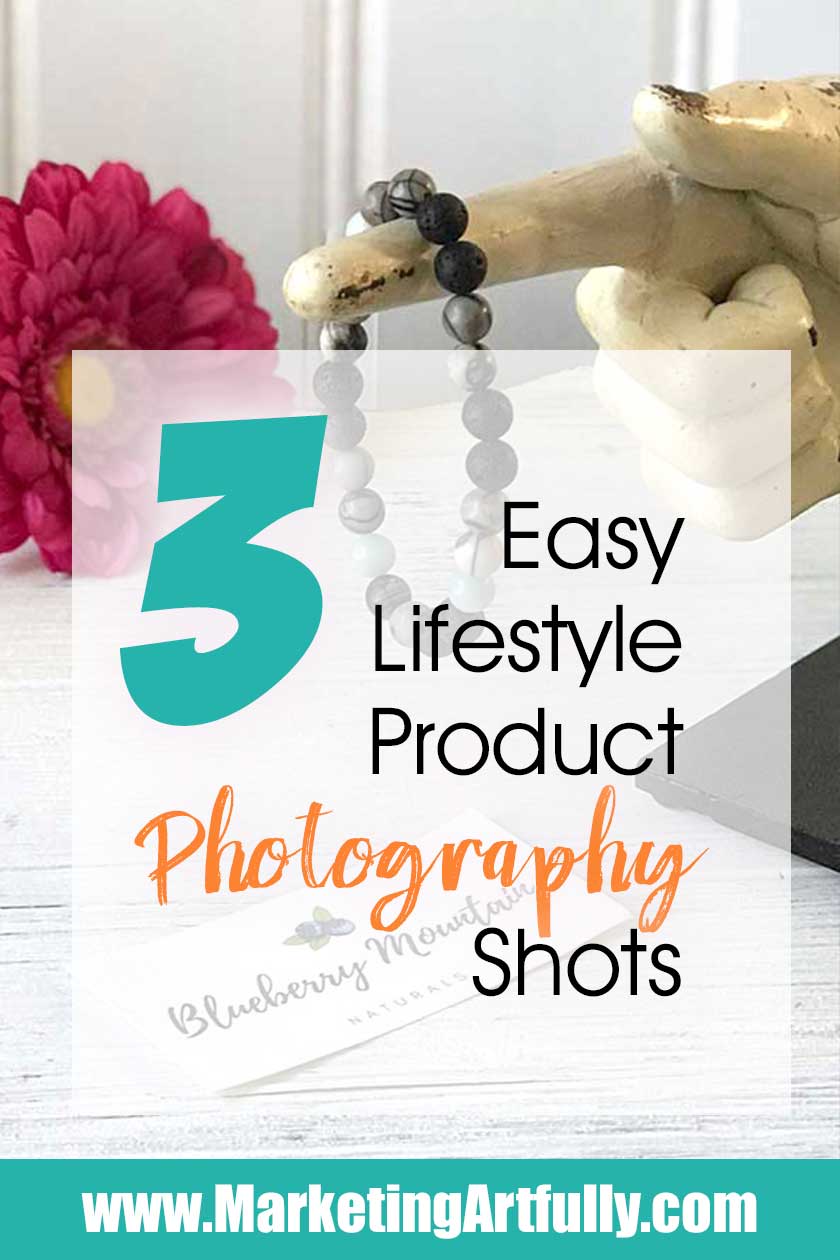
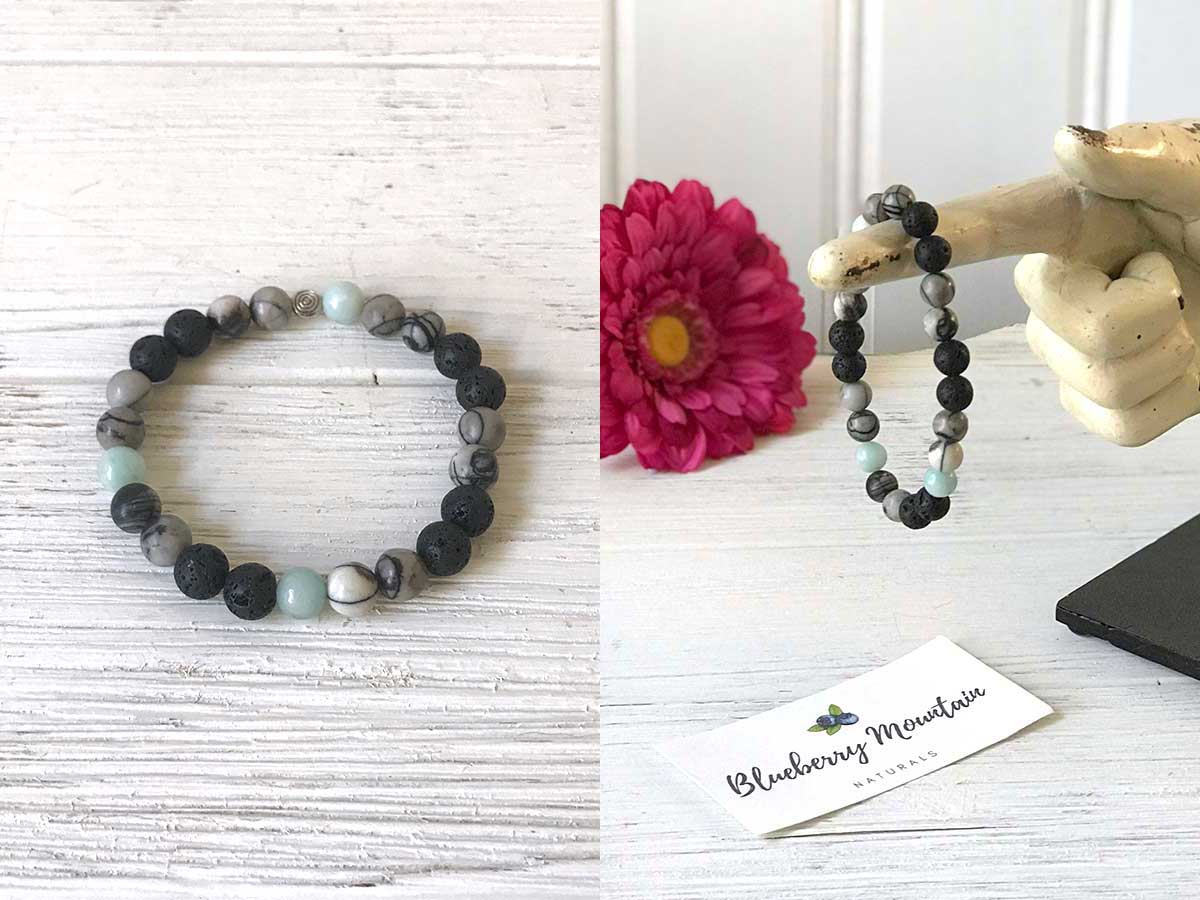
Last but not least let's look at a jewelry shot. This is a wicked cool lava bead bracelet from Andrea Martin-Frew of Blueberry Mountain Naturals.
I often see jewelry makers take a plain product shot like this to post on social media.
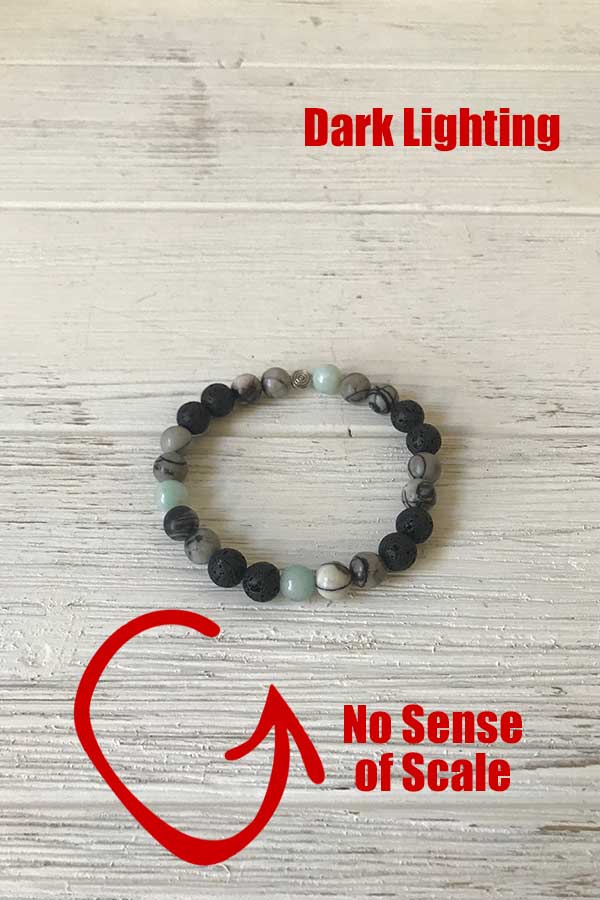
The lighting is darkk and there is no real sense of scale for this piece. In fact, seeing how it is so far from the edges of the picture it looks like it might be a baby bracelet or even a ring.
Just scootching in and brightening it up a wee little bit it made a big difference!

But what about some fun passive branding with this one? It is sometimes cool to add a bit of your logo or shop branding to the picture.
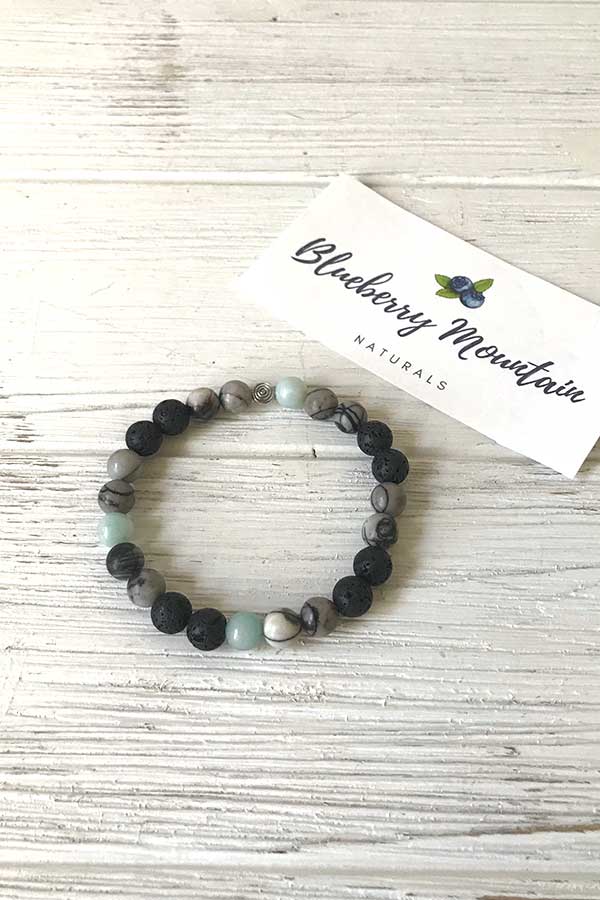
Just putting in the card with Andrea's branding added interest to the shot. Styling props don't always have to be super fancy, sometimes they can just be a little pop of color or a different texture.
Speaking of a pop of color, what about really turning it up a notch and adding a pink flower. Pink is a super popular color on Pinterest and adding a fun little flower really made this picture pop!
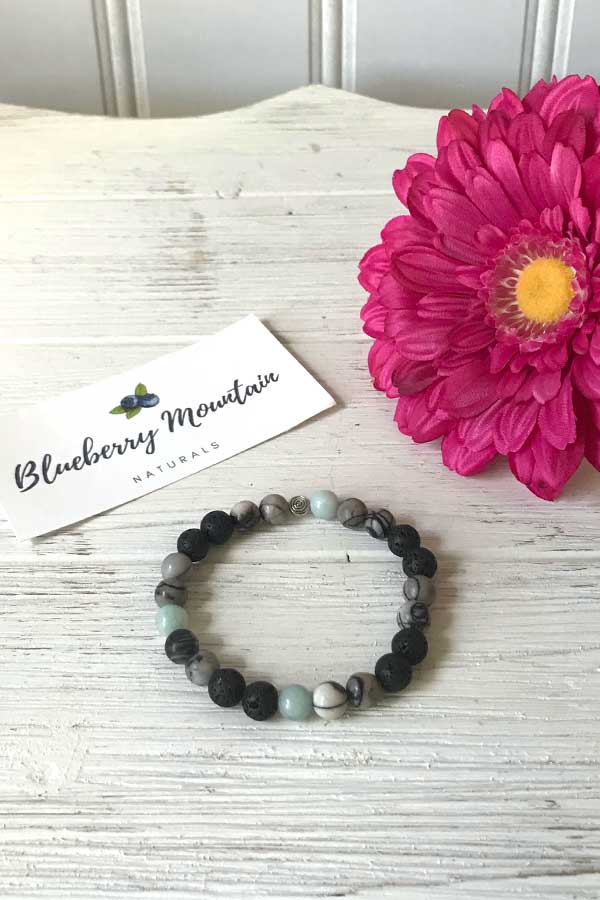
One quick word about lighting. When I put the flower in at first I had it facing the other way and there wasn't enough light to make it bright. Keep an eye on lighting in your shots!
Last but not least I added a cool finger pointy thing I got a Michaels...

The reason why it works is that, while there are a lot of things going on, the bracelet is the star of the show. It is right in the middle and your eye follows the finger point to look at it!
I actually achieved this by cropping this picture. Oftentimes less is more when your shot seems to be too busy!
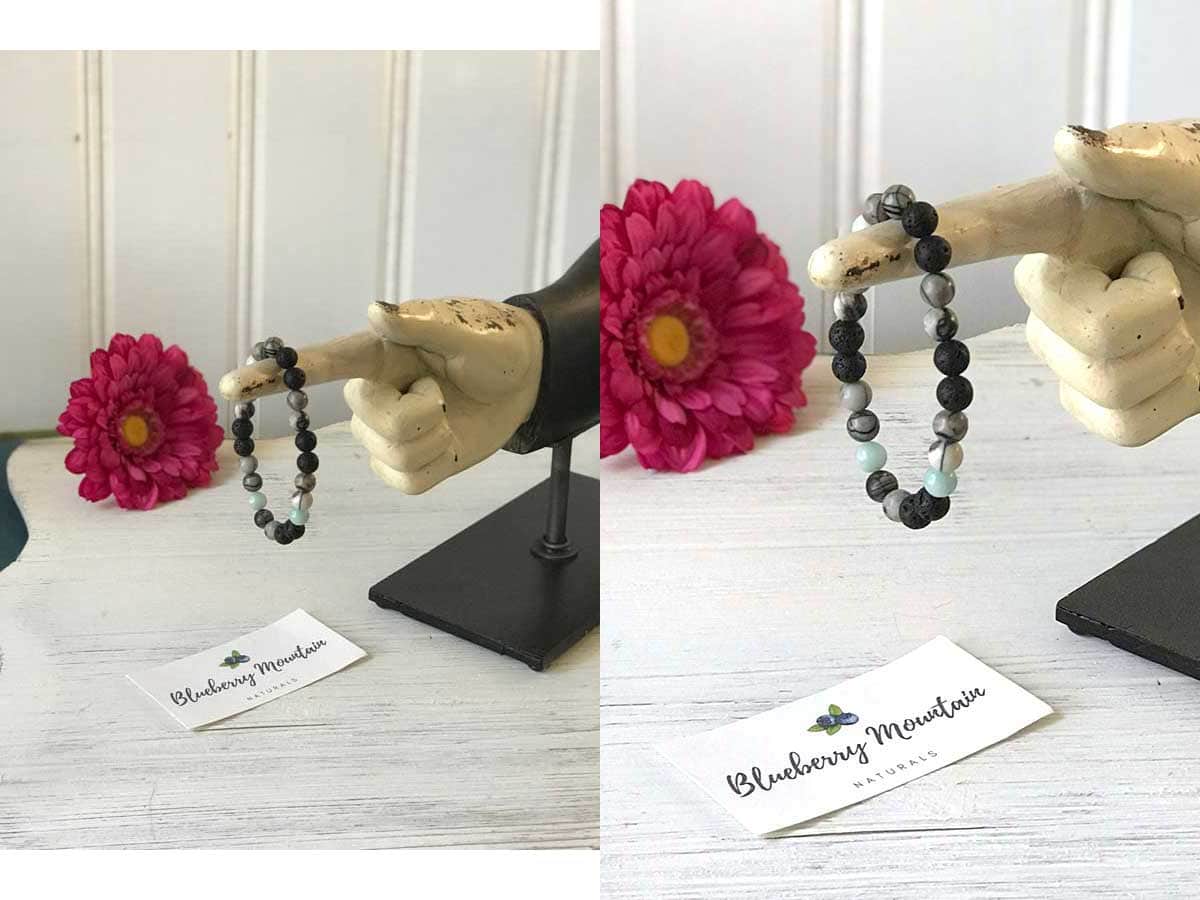
Obviously I lightened it, but had I left everything in there like more of the base and the weird cutout on the left, the bracelet gets lost in the shuffle! additional resource :: how to brighten your product photography
It is fine in this one that the flower is darker because it is only background now, not anything that we are focusing on it the shot.
And last but not least, the difference between even the good plain one and the stylized one is a night and day!
You have to remember that your customer is looking to your product to make their lives better. Showing your product in an interesting manner can make the difference between a sale and a wasted view!
Want more... check out Etsy SEO for Handmade Jewelry Sellers!
Additional Product Photography Resources
- Check out my other product photography posts!
- The class I took to learn to take interesting product photography pictures
- And all the product photography courses I love
- Should You Use White Background or Lifestyle Product Photography?